
Email marketing is still one of the best ways to communicate with your target audience, grow your customer base, and expand your business. If you’re a small business owner, a blogger, or a marketer, Mailchimp is one of the first and best options to create and manage email campaigns.
This guide is designed to help you create a Mailchimp account, set your profile, and get your first campaign ready in just a few minutes. You won’t need any advanced skills and simply by following the instructions below, you can launch your first email in a very short period of time.
What Is Mailchimp and Why Should You Use It?
It is essential to understand what Mailchimp is and why is it used so frequently.
Mailchimp started as a simple email marketing service, and has now evolved into a more complex system. It is now an all-in-one marketing and automation platform that offers:
- email marketing and automation
- landing pages and sign-up forms
- social media ad management
- audience segmentation
- analytics and reporting
Mailchimp is very simple to use, and it also offers a free plan that is ideal for small businesses, freelancers, and startups.
Advantages of Mailchimp
- User Friendly: Mailchimp’s campaign and automation tools require no coding skill.
- Cost Efficient: Mailchimp starts with a free version that covers 500 contacts. Ideal for first-timers.
- Custom Design: Mailchimp offers a variety of professionally designed template for newsletters and other promotional material.
- Compatibility: Mailchimp integrates with major services such as Shopify, WordPress, and HubSpot.
- Comprehensive Analytics: Email opens, clicks, and how engaged your audience is are tracked.
Knowing these advantages, let’s get your Mailchimp account set up.
Step 1: Visit Mailchimp
The first step is easy; head over to https://mailchimp.com
On the homepage, click the Sign Up Free button on the right to go to account creation.
The account creation process is straightforward; you only need to provide an email and set up a username and password.
Step 2: Provide Your Basic Info
After clicking Sign Up you will see a registration form that asks the following:
- Email address- Preferably business email
- username- Mailchimp offer a unique account identifier for every username,
- Password- Use a complex password, mix upper and lowercase letters, numbers and symbols.
After filling the the form click Sign Up.
Mailchimp will send a confirmation email to verify your address.
Step 3: Verify Your Email
After signing up, check your email inbox for a message from Mailchimp entitled “Activate Your Mailchimp Account.”
Once you find it, open the email, and click on the “Activate Account” button.
After this, you’ll return to the Mailchimp site and finish setting up your account.
Step 4: Complete Your Account Setup
Now Mailchimp needs a few additional details to customize the account to your preferences:
- Your Name and Business Name: Add your first and last name. Also, add the name of your business or project.
- Business Website: Add this if you have a website. If not, you can skip this.
- Business Address: Add this since it is required. Your address will also be on the footer of every email you send. This is to comply with international anti-spam regulations like CAN-SPAM and GDPR, and anti-spam regulations in all email marketing platforms including Mailchimp.
- Phone Number (Optional): Useful for account recovery and verification.
Once finished, click on the Continue button.
Step 5: Define Your Marketing Goals
Mailchimp will ask a few questions to better tailor your experience.
- What are your marketing goals? (grow your audience, sell products, newsletters, etc)
- Do you have an audience/email list?
- Which platforms are you using: Shopify, WooCommerce, WordPress, etc?
This lets Mailchimp suggest features and templates for your specific needs.
Step 6: Select Your Mailchimp Plan
Mailchimp has different price offers for different requirements and different budgets. You can start with the Free Plan and then upgrade when your audience expands.
Here’s a quick overview of the pricing options (as of 2025):
| Plan | Best For | Contacts Limit | Monthly Cost |
|---|---|---|---|
| Free | Beginners & small lists | Up to 500 contacts | $0 |
| Essentials | Growing marketers | Up to 5,000 contacts | Starts at $13/month |
| Standard | Businesses focused on automation | Up to 10,000 contacts | Starts at $20/month |
| Premium | Enterprises & advanced marketers | 10,000+ contacts | Starts at $350/mont |
As a beginner, you can access the Free Plan which gives you the most essential tools which includes the following:
- Basic email templates
- Up to 500 contacts
- 1 audience
- Basic automation tools
You can upgrade when you need more features.
Step 7. Audience
When your account is active you are prompted to set your first audience which is Mailchimp’s term for your subscriber list.Most Mailchimp users have a list of contacts saved from their website or CRM and can seamlessly import this list into Mailchimp.
To Import Contacts:
- Go to Audience on the top of the screen.
- Click on Add Contacts > Import Contacts.
- Select one of the following options:
- Upload a CSV file.
- Copy and paste from another list.
- Import from Shopify, Google Contacts, or HubSpot.
You should have permission to email all contacts on your list. Emails should be sent to those who have opted in otherwise it is illegal and connects the spams. This considerable practice protects your fabulous sender reputation.
Step 8: Create Your First Email Campaign
Now that you have your audience sorted out, we can move on to creating your first campaign!
- Navigate to the top menu and click on Create.
- From the list of options, click Email.
- Now click Regular Email and assign your campaign a name.
- Select your audience, name, and subject line.
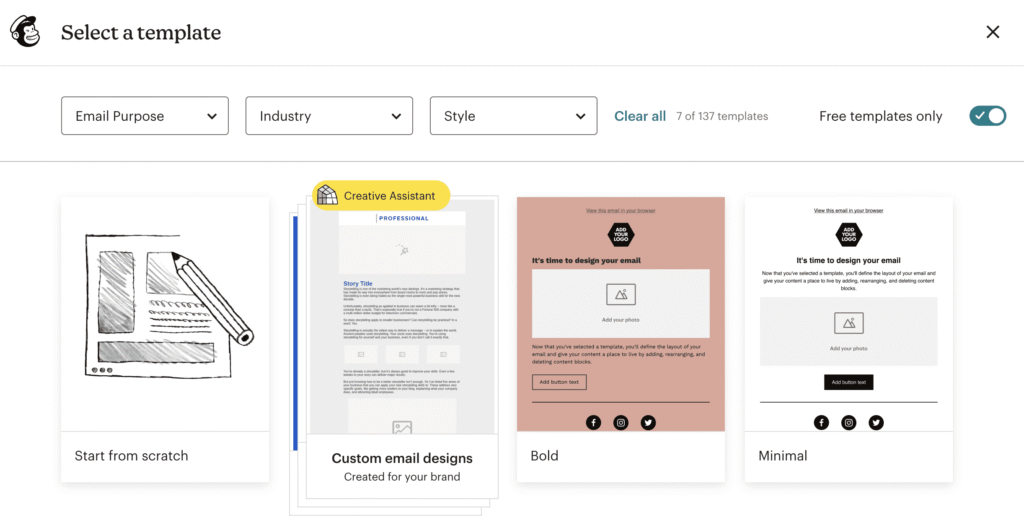
- To get started, select Design Email to use Mailchimp’s drag-and-drop template editor.
Mailchimp’s Email Builder
Mailchimp’s visual editor is one of the easiest tools to use in the industry. You can:
- Choose a pre-built template.
- Drag and drop text, images, buttons, and social links.
- Adjust the layout and color scheme.
- View your design in desktop and mobile screens.
When you finish your design, click Save and Close. You can choose Send or Schedule to plan the email for later.
Congrats, you just launched your first Mailchimp campaign!
Step 9: Verify Your Domain (Optional but Recommended)
For a more professional look to your email, you can verify your domain.
Why Verify?
This makes your email appear from your domain (like hello@yourbusiness.com) instead of Mailchimp. This helps:
- Branding
- Email Deliverability
- Avoiding spam filters (your email will not be marked as spam)
How to Verify Your Domain
- Go to your Account Settings > Domains.
- Click Add & Verify Domain.
- Enter your business email address.
- Type your business email and open the verification email you just sent and click the verification link.
For enhanced email authentication you can add DKIM and SPF records to your domain DNS settings.
Step 10: Explore Mailchimp Features
After you’ve created your account, spend some time getting to know the Mailchimp dashboard and its features. Here’s what you should look at:
- Automation Workflows
Set up automated emails for welcome, abandoned cart, and birthday messages. Relieve some of your repetitive work. - Landing Pages
Capture new leads and promote new offerings with your own design standalone pages. - Signup Forms
Increase your audience by placing signup forms on your website and social channels. - Reports and Analytics
Take a look at open and click-through rates, and how your subscribers behave. Use these insights for reporting to improve your campaigns. - Integrations
Link Mailchimp with Shopify, WooCommerce, WordPress, and Zapier to mail your campaigns.
Common Mistakes to Avoid When Creating a Mailchimp Account
Setting up Mailchimp is easy, but there are some mistakes a beginner can make that will cause problems with your email marketing. Here are some common mistakes:
- Not verifying your email or domain which lowers deliverability rates.
- Audience segmentation is key. Sending the same email to everyone means less engagement.
- Forget to add the unsubscribe link? You violate Mailchimp’s terms and spam laws, which can get you in trouble.
- Upload unverified list of contacts to your account and risk having it suspended.
- Emails that are over-designed can contribute to a poor user experience. Keep it simple.
Build on the effective use of email marketing by avoiding the identified pitfalls.
Here are other article: https://jamasho.com/15-best-figma-plugins/
Conclusion
It takes only a few minutes to set up an account on Mailchimp but the benefits it offers your business are virtually limitless. Mailchimp caters to the email marketing needs of everyone from small business owners to big corporations due to its user-friendly design, flexible templates, and powerful automation features.
Mailchimp enables you to grow your audience and increase engagement with your marketing campaigns, whether you are sending a newsletter, promoting a product, or nurturing a lead.
So, what are you waiting for? Go to Mailchimp and set up your free account. You will be able to start your first campaign even before your coffee cools down.
If you are considering a fully integrated marketing solution that helps automate, track, and grow your campaigns, you’ve likely heard of HubSpot Marketing Hub. It is a standout platform for good reason since it offers a seamless approach to email marketing, automation, social media, SEO, and Analytics.
This guide covers all the important details about HubSpot Marketing Hub, including its pricing, features, advantages, disadvantages, real cases, and more, to determine if it’s the right solution for your business.